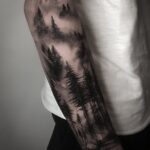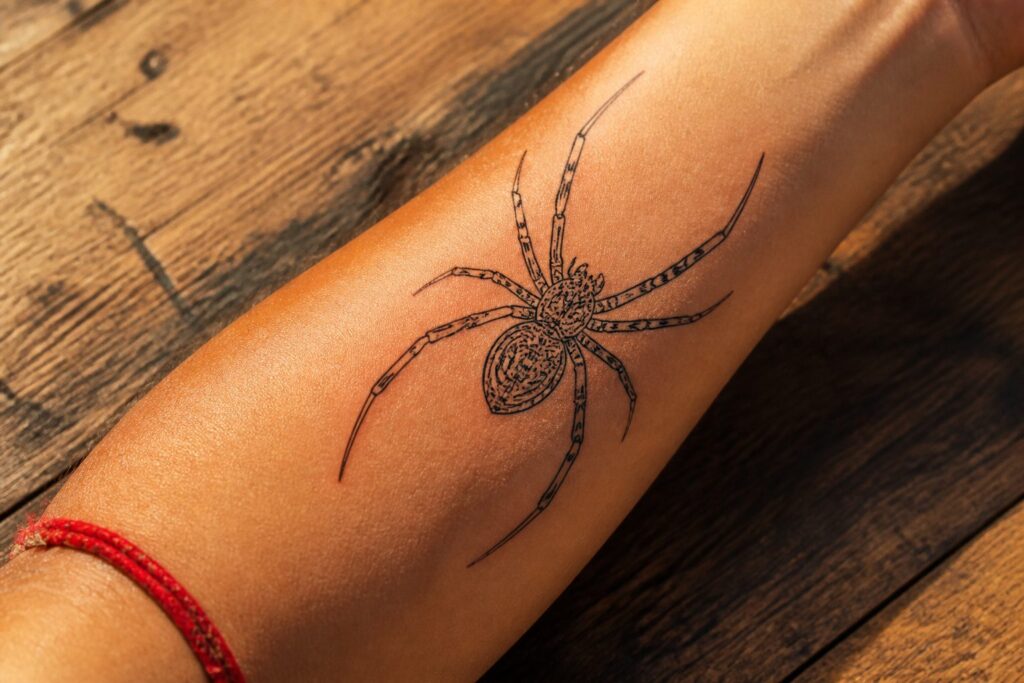
A spider stencil tattoo is the transfer blueprint an artist lays on skin before a single needle breaks the surface.
The stencil fails if the legs blur together, which happens the moment a reference photo lacks clear side lighting to separate each limb into its own crisp channel.
A traditional piece runs on bold black outlines and a tight palette of red, maybe a hard yellow, because limited color keeps the spider readable from across a room after the ink settles.
[link-whisper-related-posts]Traditional Spider Tattoo Stencil
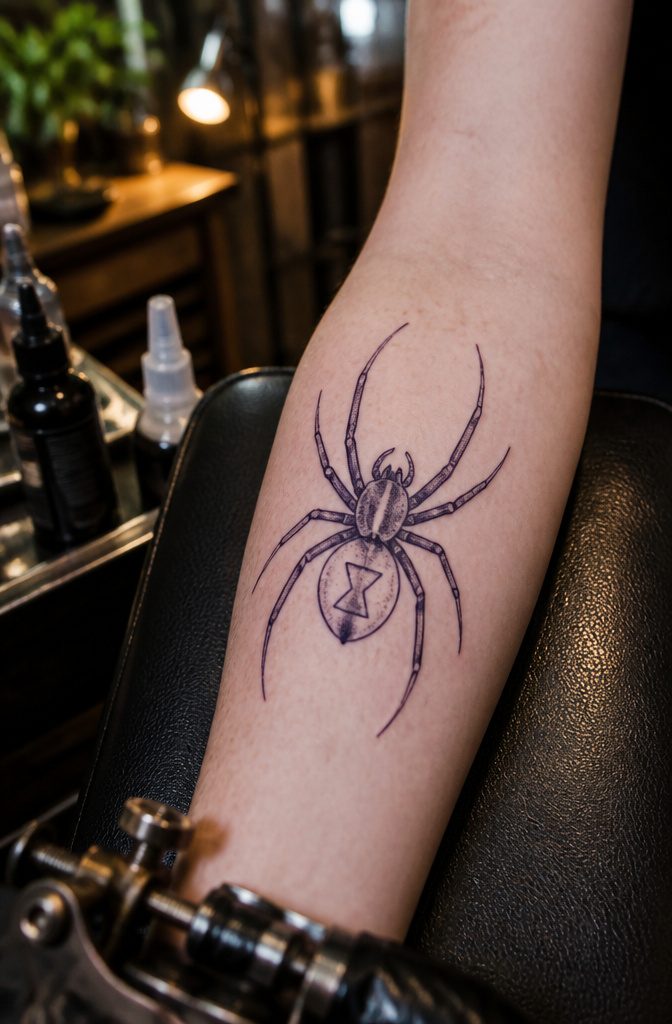
Bold black lines, heavy shading, and that classic Sailor Jerry feel make traditional spider stencils one of the most requested styles in any shop.
Thick outlines transfer clean from stencil to skin, which matters more than most first-timers realize when they pick a delicate line art reference and watch it blur by week three.
Limited color keeps the stencil readable too.
Traditional work runs on a tight palette: black, red, maybe a hard yellow or green if the client insists. The spider reads immediately from across a room because nothing competes for attention.
Eight legs are where the style earns its keep. A traditional stencil spaces them deliberately, each leg its own distinct shape rather than a tangle of thin segments.
The artist builds negative space into the leg spread so the spider doesn’t collapse into a dark blob once the needle packs in the fill.
Crowding happens when someone tries to squeeze full anatomical detail into a 2-inch spot; traditional design solves that by simplifying each leg to a bold, readable curve that holds at distance.
Heavy shading on the cephalothorax gives weight without clutter.
The classic approach leaves the abdomen lighter, often with a simple hourglass or stripe, so the eye travels to the body first and the legs second. That hierarchy is stencil logic, not just style.

153 PCS Halloween Face Paint Stencil Set: Featuring 12 sheets (4 unique spooky colors with 3 sheets each), totaling 153 intricate designs. Dive into the spirit of the season with a massive variety of Halloween icons including Jack-o'-lanterns, wicked witches, spooky skeletons, crawling spiders, bats, ghosts, haunted castles, evil eyes, and more. With so many options, you'll have the perfect pattern for every eerie look and creative idea

▶ Henna Tattoo Kit: 16 sheets tattoo stencils. airbrush tattoo stencils suitable for tattoo lovers. Experience the effects of tattooing without the pain of tattooing.

Simple Spider Tattoo Stencil
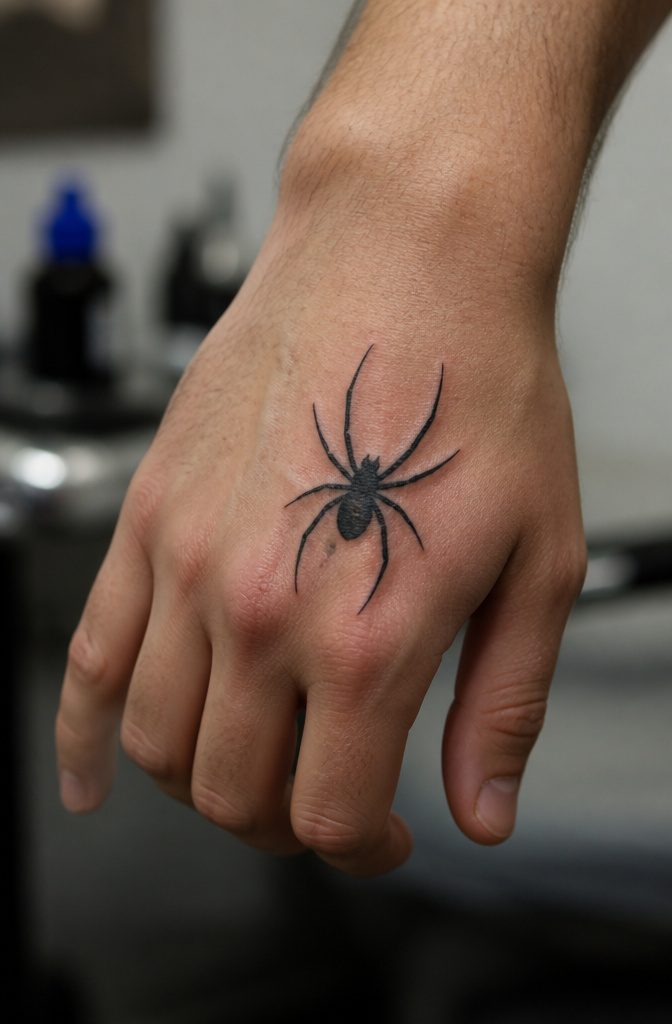
A simple spider stencil tattoo works best as a silhouette or near-silhouette: clean legs, no web, no shading.
First-timers gravitate toward this version, and so do artists booking small placements. The reason is practical.
A stencil with minimal lines transfers faster and holds its edge under sweat or movement. Bold shapes also heal more predictably than threads of detail that can drop out or blur together.
The back of the hand and the area behind the ear are two spots where this approach pays off.
Skin there moves constantly and sits close to bone, so a stencil that relies on negative space rather than fine detail gives the needle room to lay ink without chasing something too fragile.
Fewer lines means fewer chances for the stencil to smudge during transfer or soften after a week of healing.
Speed matters in a busy shop, but so does longevity.
A spider rendered as a dark shape still reads as a spider at five years because the silhouette does not depend on line weight the way an anatomically detailed piece does.
That durability makes the simple stencil a genuine workhorse rather than just an easy option.

Spiderweb and Spider Stencils: You will get 1 pcs spiderweb and spider pattern(five kinds of spider webs, three kinds of spiders) painting stencil. Size is 30x30cm/11.8x11.8inch. This is a good template for Halloween drawing or doodling. Perfect for your daily DIY making needs to decorate your home.

Package Contents: You will receive 1 piece reusable painting stencil in A4 size measuring 8.3 x 11.7 inches / 21 x 29.7 cm

【Spider Web】You will receive 3 pieces Halloween themed painting templates. One of them is a spider pattern with different styles of spiders, big and small; the other two have a spider web style pattern. It is full of Halloween atmosphere.
3D Spider Tattoo Stencil
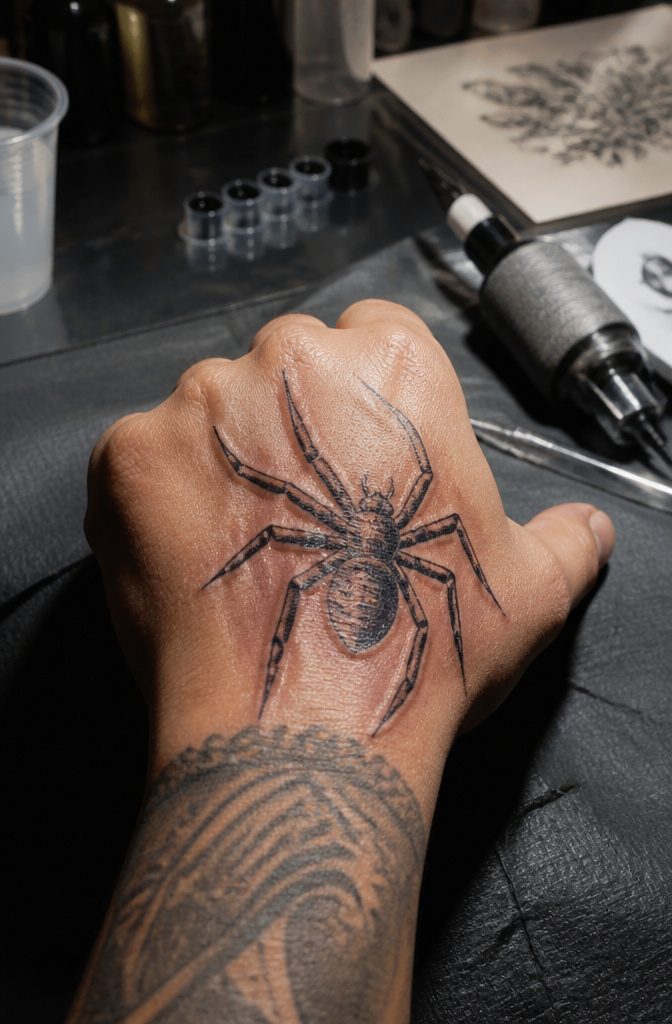
Hatching builds a 3D spider by turning fine directional textures into bristle and volume without dropping solid black.
Side lighting in your reference photo is what makes this work, because the raking angle throws each leg hair into sharp relief and leaves the soft underbelly in shadow.
Without that contrast the hatching goes flat, no matter how tight your needle grouping.
Leg separation is where depth lives or dies.
Where the joints overlap in shadow, the stencil needs enough negative space to let the darker passes read as distance. Crowd those lines and the spider collapses into a single dark mass.
Rounded surfaces are where this investment pays off. The neck or the back of a hand gives the convex curve the design needs, so the glossy abdomen specular highlight and the deep belly shadows actually wrap around something.
A flat forearm fights the illusion. Put it where the body does half the sculpting for you.

171 PCS Different Styles Halloween Tattoos Stencil: Our hallloween temporary tattoo stencils sheet comes with 171 different hallloween design such as pumpkin lamps, black cats, skulls, wizards, witch hats, ghoost, witch, Spider Web, Skeleton more halloween Style in 12 sheets A5 size. Perfect for couple halloween party and decoration.


Package Contains Halloween tattoos stencils total 3 Sheets. Self-adhesive Henna stencils with various patterns. Only has tattoo template, no tattoo ink
Black Widow Spider Tattoo Stencil
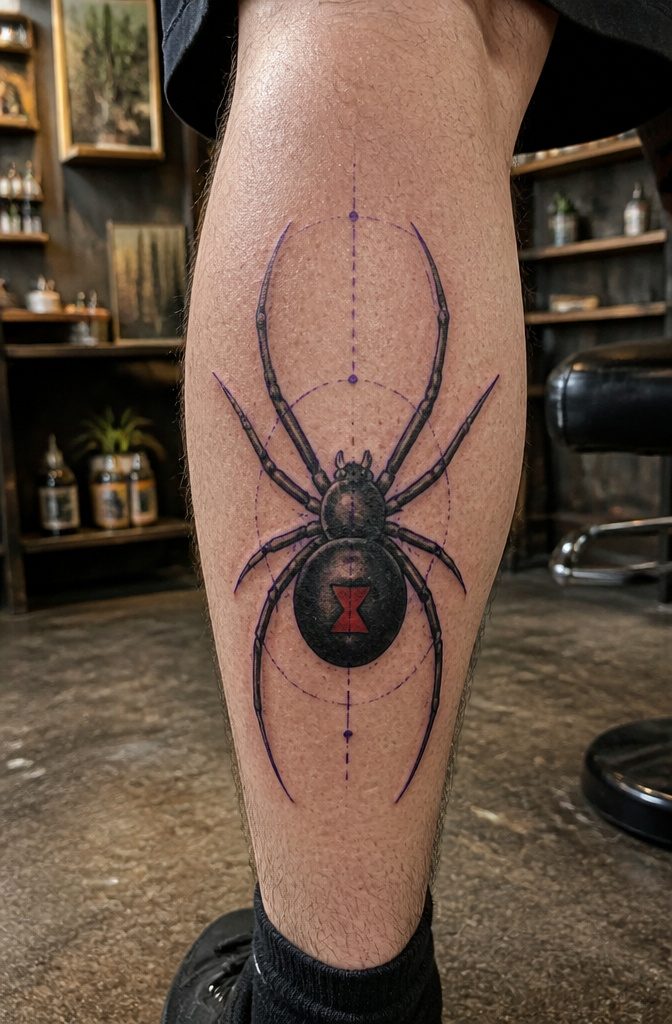
The red hourglass against matte black is what makes the Black Widow legible at a glance, and that contrast is where the stencil earns its keep or falls apart.
A bulbous abdomen simplifies the outline; you get one round mass with a clear waist, no fiddly segmentation to transfer.
The red accent sits dead center, a narrow field that the stencil maps with either a single cutout for solid color packing or a registration mark for hand-painted touch-up later.
Color complicates the stencil only if the artist tries to carry two tones in one layer. Most shops break it into stages: black body first, let it lock, then hit the belly red.
The limited palette actually helps. You are not blending, not fading, just two zones that meet at a hard edge.
A sloppy stencil shows immediately here because the hourglass has no margin for drift; half a millimeter left or right and the symbol reads wrong, the spider becomes generic.
I have seen apprentices try to carry the red as a transparent wash through the same stencil layer, thinking they will save time.
The black bleeds through, the red muddies, and the client comes back asking why the warning sign looks like rust.
Separate your layers. The black widow demands it.

Easy to Use : These stencils ensure a flawless finish, making them suitable for both beginners and professionals. Experiment with different paint patterns and unleash your creativity!

9PCS Spider Webs and Spider Stencils: You will receive 9PCS creative hollow out painting template with a Halloween theme. The stencils features 9 styles Spider Webs and Spider patterns, the unique designs will surely inspire you. Our stencil are suitable for decorating for easy DIY home decoration, add a splash of Halloween color to your home.

Easy to Use : These stencils ensure a flawless finish, making them suitable for both beginners and professionals. Experiment with different paint patterns and unleash your creativity!
Spider Web Tattoo Stencil
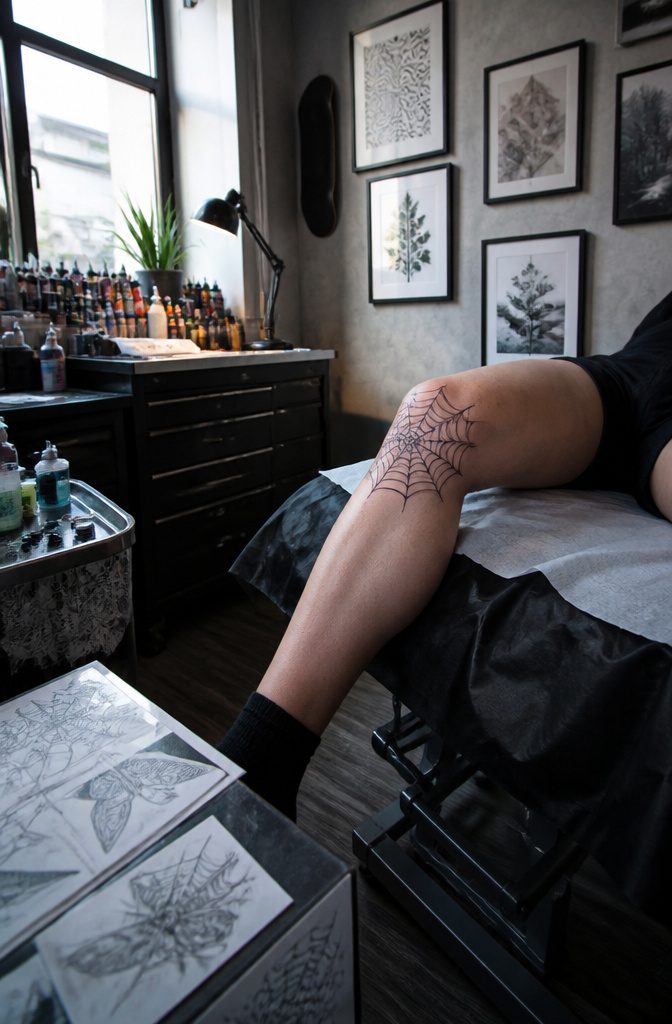
Spider web stencils stand alone as architecture rather than accompaniment.
The radial symmetry demands a different discipline from the spider body itself: lines must run straight to a vanishing center, and any wobble reads as a flaw across six or eight repeating spokes.
I have watched artists reset a knee piece three times because a single thread curved 2 mm off true; the eye catches it instantly under the geometry.
Elbows, knees, and throat raise the stakes further.
Skin tension there shifts with every bend, so the artist maps the web with the joint both flexed and relaxed. A web drawn on flat skin becomes a bowed mess the moment the client moves.
Placement above the elbow ditch or across the kneecap requires the stencil to anticipate distortion, stretching the center slightly so it relaxes into symmetry when the joint locks straight.
The standalone web carries its own meaning, separate from the spider. It reads as time, entrapment, or patience depending on tightness and strand count.
Most artists keep the line weight light, almost threadbare, since heavy ink here ages into muddy lace rather than structure. Thin work also heals faster on spots that see constant motion and friction.

【Massive Quantity for Group Fun】 This mega value pack includes 36 sheets featuring over 250+ unique Halloween temporary tattoos. With a massive variety of creepy crawly spiders, intricate cobwebs, bats, and gothic accents, this set is perfect for sharing at Halloween parties, classrooms, or family gatherings

Complete Spider Halloween Look: Get 4 pcs halloween freckle tattoos (spider web and spider) and 3 pcs spider temporary tattoos, each with spider designs in different sizes. Layer spider face stickers on your cheeks and larger spider tatoo patterns on arms or shoulders for a head-to-toe spooky style

10 Sheets Halloween Spider Temporary Tattoos: This package contains 10 sheets featuring Fake Spider Temporary Tattoos. Perfect for Halloween makeup, cosplay and costume dress-up for men and women
Tarantula Spider Tattoo Stencil
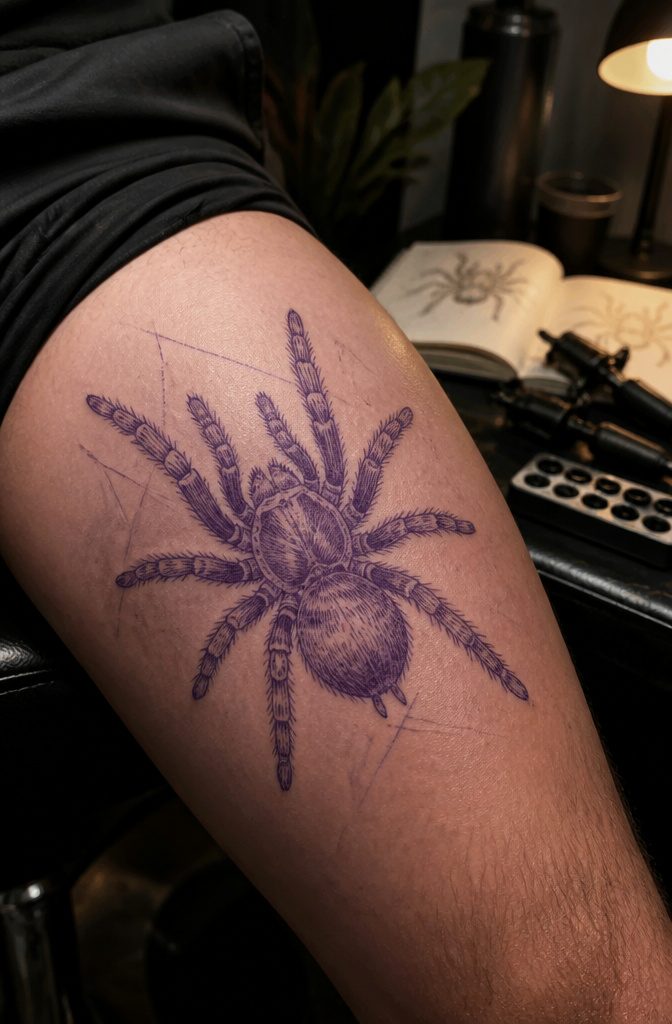
A tarantula demands more from a stencil than any pull from a flash sheet. The hairs along each leg catch light in layers, and the abdomen carries a velvet weight that a clean outline erases entirely.
Hatching is what keeps that texture alive through the transfer, building tone that reads as bulk once the needle starts.
The reference photo matters as much as the drawing.
Shoot or source from above and from the side; one angle flattens the leg span, and a weaker photo forces you to invent the overlap where the limbs tuck beneath the body. That guesswork shows up later as muddy shading.
The thigh or back are the placements that actually fit this much detail. A tarantula crammed into a forearm tightens the legs together, and as the lines settle over months that density blends into a dark smear.
Spread across a larger canvas, the same stencil leaves room between each limb so the silhouette still registers from across the room.
I have seen stencil work that tried to stay bold with outline alone on a spider this size.
The tattoo held, but the animal looked graphic and flat, more logo than living thing. For the tarantula specifically, you lose exactly why anyone picks one in the first place.

[ Rich Pattern Selection ]: This set of temporary tattoo stencils contains 183 different design patterns. Everyday children's favorite designs such as butterflies, mermaids, flowers, animals, letters, crowns, dinosaurs, and Christmas holiday styles such as pumpkins and snowflakes allow children to give full play to their imagination and fill in patterns freely. It is an ideal gift for children.

【Halloween Spider Face Web Tattoos】10sheets with 65pcs vivid spider web face temporary tattoo for kid and adults favor. Horrible black spider and spider web, spooky and scary design in different shape,wide variety to choose from,enough to share with family and friend at the Halloween party.The perfect Halloween costume accessories for women,boys and girls.
Fine Line Spider Tattoo Stencil
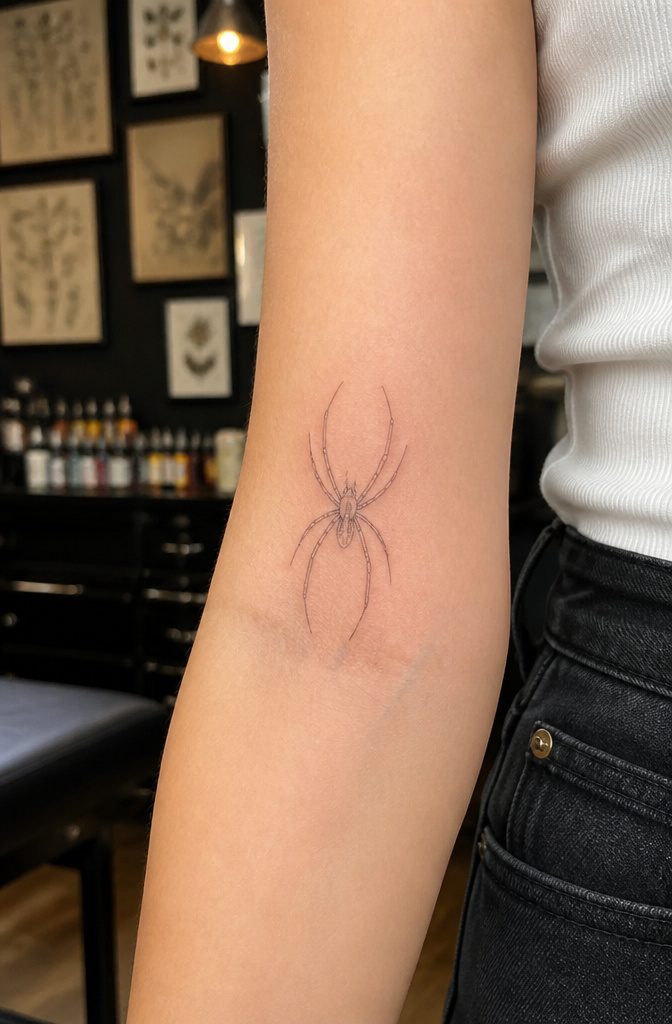
Fine line work asks the most of a spider stencil tattoo, and the legs are where it shows.
The thinnest lines survive translation to stencil only if the reference image keeps each leg clearly separated and lit; overlap a shadow across two legs and the stencil merges them into one blurred channel.
That same risk follows onto skin. Blowout travels fast in skin that moves or stretches, which is why this style favors the inner arm or the rib cage, flatter zones where the needle holds steady and the ink stays put.
Hatching keeps the leg hairs and the glossy body in the reference, but outline reads cleaner when you want a crisp silhouette that will still look like eight distinct legs once healed.
Light matters as much as line weight; a reference shot from the side with one clear light source gives the stencil something to grip, and the artist something to follow, so the finished tattoo keeps that definition for years rather than letting it wash into a soft gray smudge.

You will receive 1 vinyl sheet that contains 10 spider web stencils and 2 spider stencils. Size of spider web 13/16in x 1 1/4in (20mm x 31mm), size of spider 5/16in x 3/8in (8mm x 9mm). Sheet size: 3in x 5in (75mm x 125mm).

The Spiderweb and Spider stencil is a must-have for creating Halloween or Day of the Dead looks! The spider web can be placed on forehead or cheek for Day of the Dead skull looks, or use the cobweb and spider for decaying Halloween or goth effects! 🇺🇸MADE IN USA

【What You Will Receive】: You will receive 80 pieces of stencils for painting in 80 different styles and 1 piece metal open ring totally,There is a sufficient quantity and rich design, which will meet your different needs for drawing handicrafts and various DIY crafts. You can also share with your friends and family.
Geometric Spider Tattoo Stencil
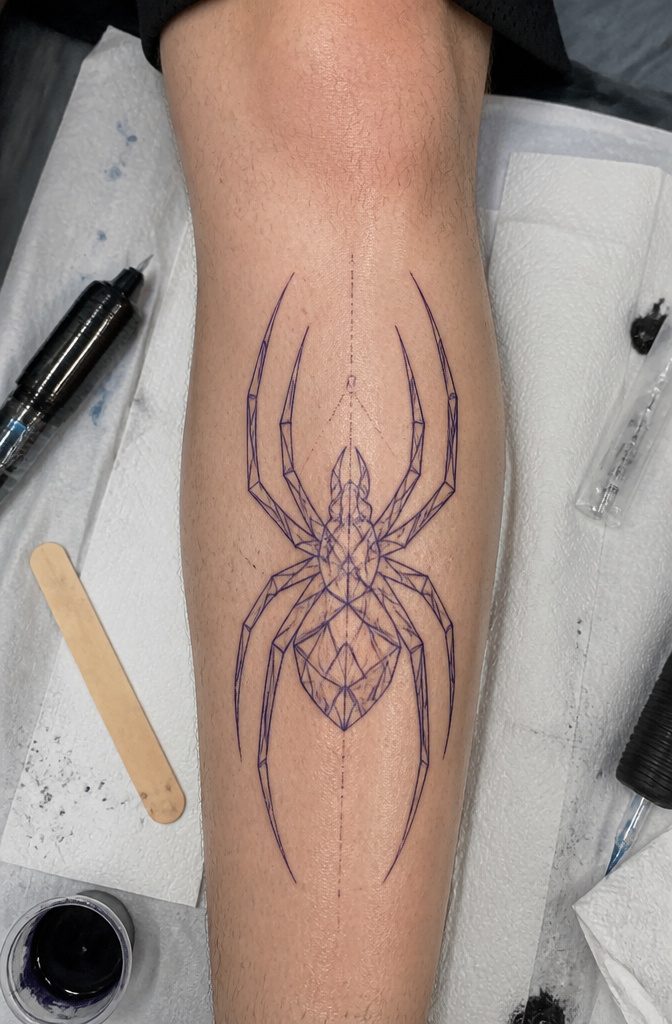
A geometric spider stencil tattoo breaks the body into planes, triangles, and hexagons rather than following the soft curve of each leg. The mandibles become a pointed chevron.
The abdomen turns into a faceted gem. Two paths feed this look: sacred geometry work from the early 2010s, and the later spread of low-poly digital illustration into tattoo flash.
The polygonal breakdown runs into trouble where real spiders are least symmetrical. A living spider carries eight legs of slightly different lengths, joints at uneven angles, and eyes that cluster in two uneven rows.
The stencil has to decide which of those asymmetries to flatten into balance and which to keep as a deliberate disruption.
Most artists handle this by tightening the front four legs into mirror pairs and letting the rear legs splay at slightly different angles, so the geometry reads as intentional rather than failed.
Where symmetry helps is the body itself.
The cephalothorax and abdomen, treated as stacked solids, hold a center line that anchors the whole piece on a forearm or shin. But the stencil cannot carry that precision to skin without the same compass-and-ruler discipline used in the drawing.
A wavering line in the breakdown collapses the effect into a messy outline. The transfer paper has to show clean intersections; the artist has to follow them without drifting into softer curves.

Creates a perfect outline onto the skin.

183PCS Different Styles Tattoos Stencil: Our temporary tattoo stencils forkids comes with 183 temporary tattoo stencils painting set design such as flowers, cats, hearts, skulls, dinosaurs, fruits, deer, scorpions, Hannah, unicorns, whales, cars, rainbows, telescopes, ships, too fast, astronauts, pirates, letters, stars and more Style in 12 sheets A5 size. Perfect for festivals, parties, or daily fashion.

RICH TEMPORARY TATTOO KIT - Contains rich tattoos pattern templates ,4 tattoo inks in 4 colors (Maroon,Black,Cherry red,Green),4 disposable gloves 1 pack of cleaning supplies,allowing you to easily create unique personalized tattoos
Skull and Spider Tattoo Stencil
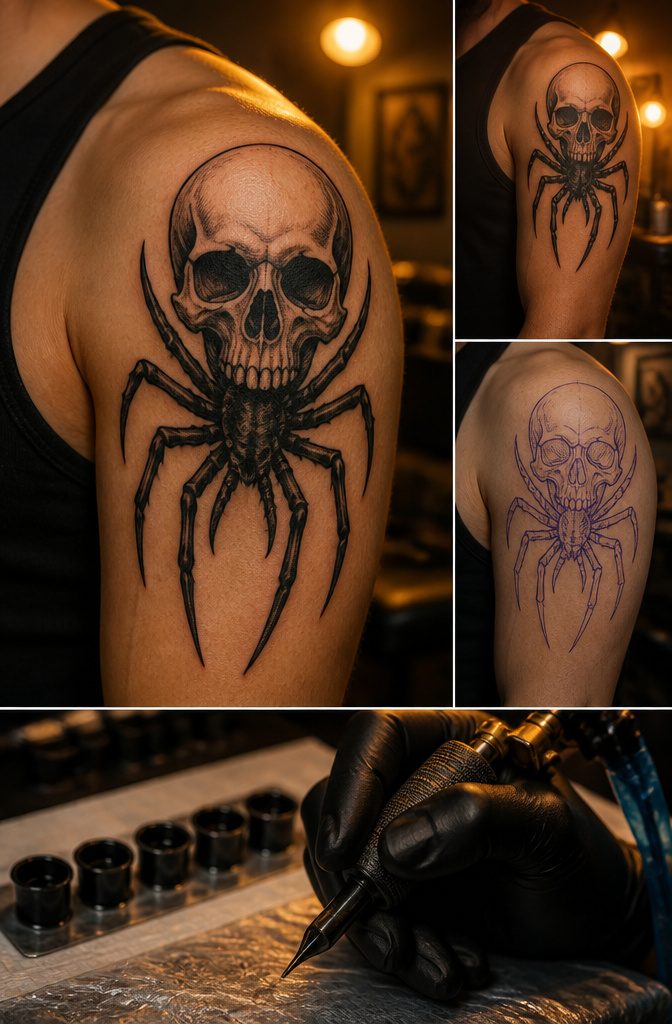
Swapping the spider’s body for a skull changes every stencil decision you make. The skull becomes the dominant mass, the anchor that the eye finds first.
Eight legs still need to radiate clearly enough to read as arachnid, but their lines must defer or weave through the skull’s jawline and eye sockets rather than compete with them.
That sharing of negative space is where most mash-up stencils fail: two bold subjects demand attention to the same patch of skin, and the compromise usually leaves both looking cramped.
The pairing carries a weight neither element owns alone.
Skulls speak mortality straight on; spiders add patience, the trap, the venomous end. Combined, the stencil becomes a warning about the ways death waits and watches.
Your artist needs to decide which layer prints first in the transfer. Getting that order wrong means wiping the detail during application and starting the stencil again.

Package including: You will get 8 pieces craft stencils in this package, and each stencils is measure 7.1 by 11 inch.

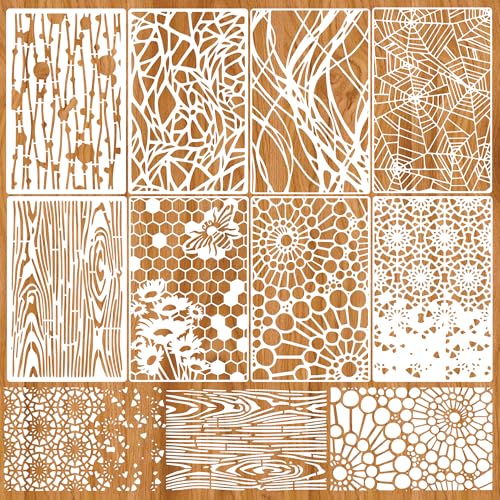
Package content:There are 8 pcs mixed media stencils for painting and each layering stencils is measure 7.1 by 11 inch,you can create art texture pattern according to your preference
Minimalist Spider Tattoo Stencil
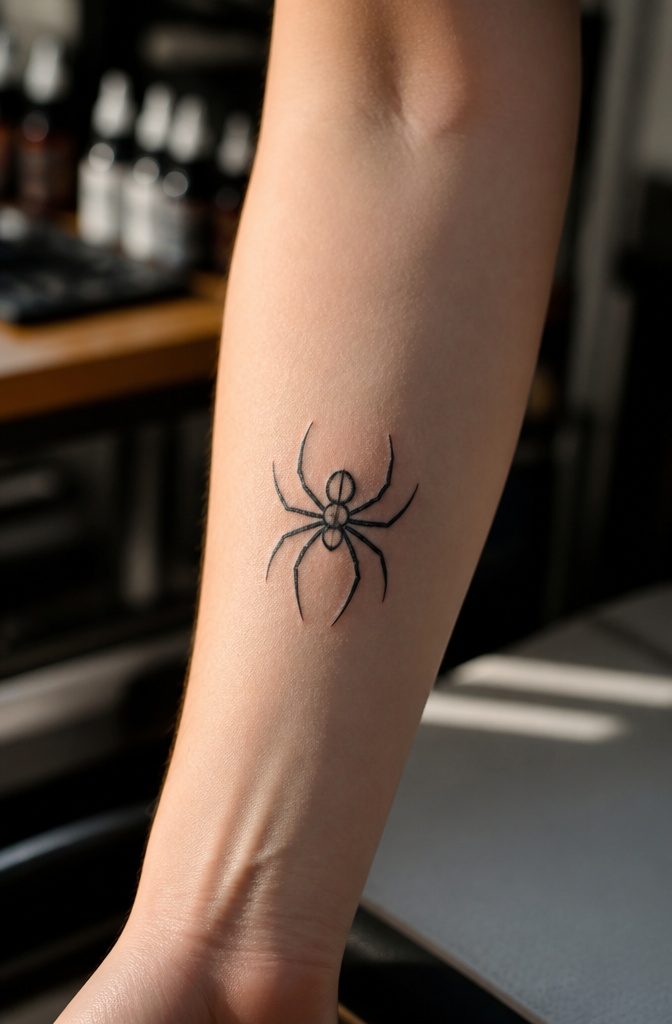
A spider drawn with three circles and eight bent lines still registers instantly as a spider to anyone who sees it. That is the difference between simple and minimalist.
Simple removes detail because the artist did not know what to keep. Minimalism removes everything except what carries the meaning, and the discipline is harder than it looks.
Single-needle transfer is what makes this restraint possible on skin.
The stencil itself holds only the spine, the two body segments, and four leg angles per side. The needle deposits just enough carbon that the artist sees where not to ink.
The negative space between those lines does the actual work of suggesting joints, weight, and the way a real spider crouches. Without that breathing room, the same marks collapse into a black asterisk.
Heavier spider designs, thick with crosshatching and webbing behind them, often blow out at the edges within a few years.
The minimalist version has nothing to blur. The lines stay where they were placed because there is nowhere for the ink to migrate, and the eye of the viewer still fills in the rest.

Variety Temporary Tattoos: Includes 36 sheets of glow spider tattoos with over 260 unique spider-themed designs in diverse styles. Whether you're decorating for a party or creating personalized body art, you'll easily find your favorite patterns for endless creative combinations.

- Easy Application in Minutes Cut out the design, peel off the clear film and place it face down on clean, dry skin; keep it still, soak the backing with water, press for 30 to 40 seconds, then lift the paper gently from a corner.

🌊【18 Sheets Halloween Temporary Tattoos For Men Women】GOROMON Brand Waterproof Halloween Temporary Tattoos For Adults Fashion Hot Popular Designs Tattoo Stickers In One Package. Package Include 18 Sheets Horrible 3D Spider Spiderweb Spider Web Tattoos For Eye Tattoos And Face Tattoos Scary Bloody Fake Scar Temporary Tattoos For Halloween Tattoos Realistic Scratch Suture Wound Tattoos Halloween Makeup Kit Face Makeup Tattoos Badly Mutilated Tatoos.
Mash-Up Tattoos
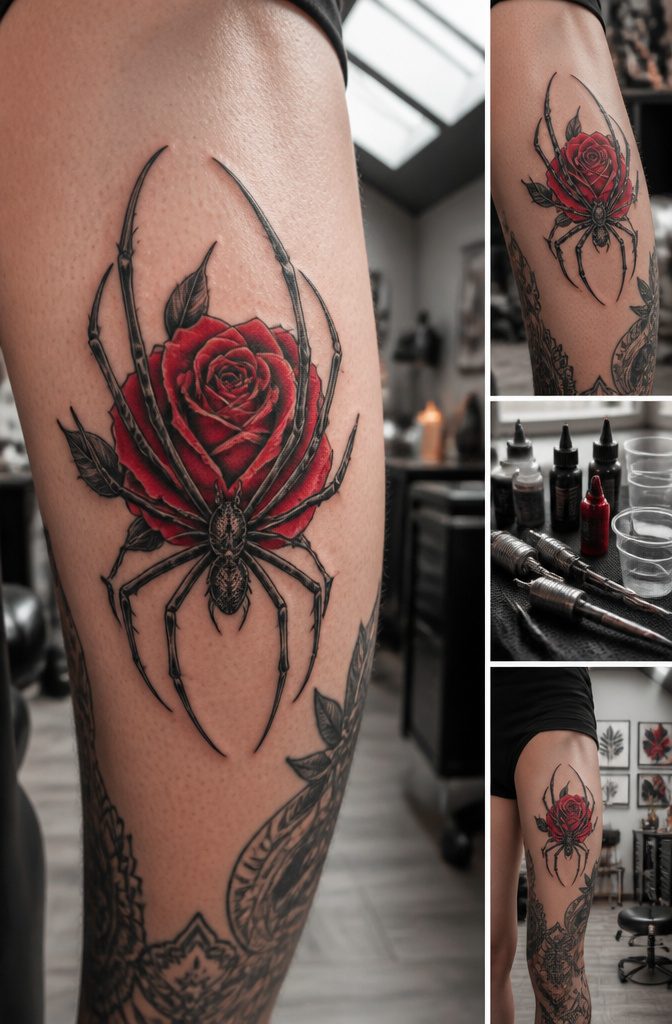
A spider with its body swapped out for a skull, a clock face, or a rose still needs all eight legs readable from across the room.
The stencil process changes because the legs stop belonging to a central silhouette and become lines that have to weave through or around a second subject.
Layering transfers is where most mash-ups fail on the first attempt. One layer carries the replacement object, the second maps the leg joints and the fuzzy fringe of texture that keeps the spider from flattening into an inkblot.
If the legs are drawn before the flower or dagger is positioned, the joints land in odd spots and the whole thing tilts off balance.
The artist has to decide which element owns the center of gravity. A bulbous clock body can anchor the composition, but only if the legs radiate from points that look like they could actually bend.
Scaling gets tighter when every leg has to clear a skull’s eye socket or a dagger’s hilt.
Spread the legs too wide and the mash-up reads as two tattoos colliding. Pull them too close and the hair detail smears together in black ink.
The workaround, seen in neotraditional flash, is to let one or two legs break the frame or wrap behind the secondary object, which adds depth without losing the eight-legged count.
I have watched artists burn a test stencil on paper first just to check if the spider reads at a glance.
If the viewer has to pause to find the eighth leg, the balance is off and the transfer gets redone before skin ever sees it.
Popularity and What Spiders Mean
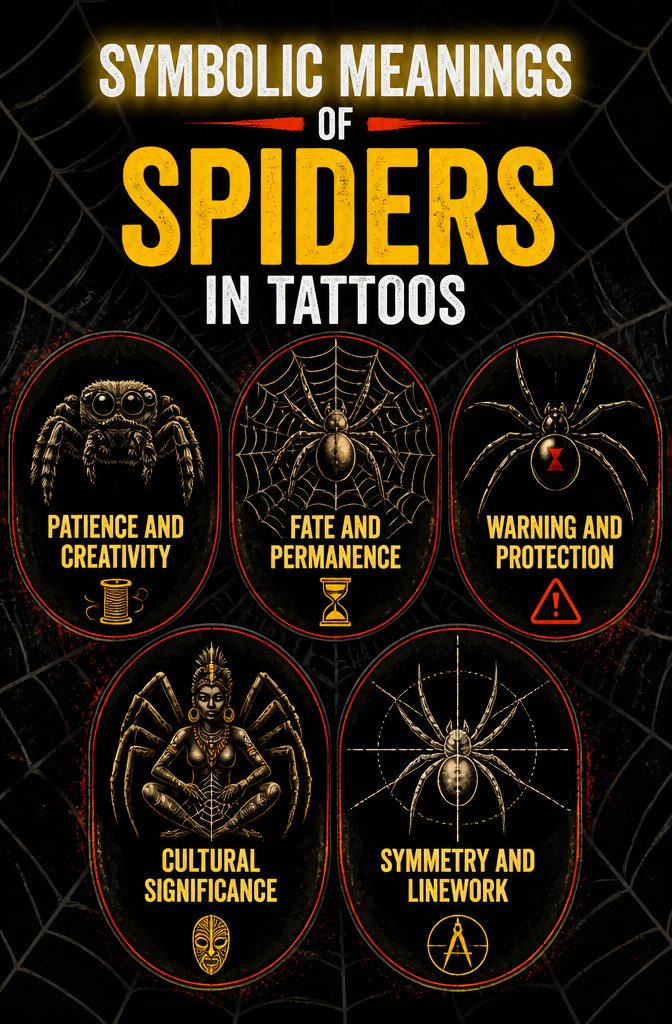
Spiders carry meanings you probably already half-know. Patience, creativity, fate: the three most common reasons people ask for one at the consultation table.
Each meaning drives the stencil in a different direction, and getting that direction wrong is how a spider ends up looking decorative instead of intentional.
A fate reading wants permanence in the line.
Heavy, continuous outlines, symmetrical legs, no breaks where the eye can wander. The web, if you include one, should feel finished, not trailing off.
I have seen apprentices draw beautiful fragmented webs and then watch the client go quiet: an unfinished web reads as uncertainty, and that is not the message someone wants pressed into their skin for decades.
Creativity calls for the opposite. Open structure, space between the strands, maybe a leg or two lifting free of the body to suggest motion.
The spider as weaver, not the trap itself but the act of making it. Here the stencil can breathe; you have room for negative space that a fate piece would close in.
The danger side matters too, though it surfaces less often in conversation.
Protection, warning, the black widow as a don’t-touch emblem. That approach usually pushes the design toward heavier fill or 3D, which means a different stencil prep entirely.
Traditions outside American tattooing carry weight here. Indigenous stories across the Americas cast Spider Woman or a comparable figure as the teacher of weaving.
West African and Caribbean lore ties Anansi to wit and survival. A client who names one of these roots usually wants the symbolism foregrounded, not the biological accuracy, and the stencil should reflect that priority from the first pass.
Built-in symmetry is what makes the spider a reliable exercise for linework. The body gives you a center; eight legs radiate on axes you can check by eye.
That natural geometry is why the design scales well and why artists keep it in rotation: a small spider behind the ear or a full tarantula wrapping a forearm both hold together because the form itself balances.
Choosing Placement by Design Size
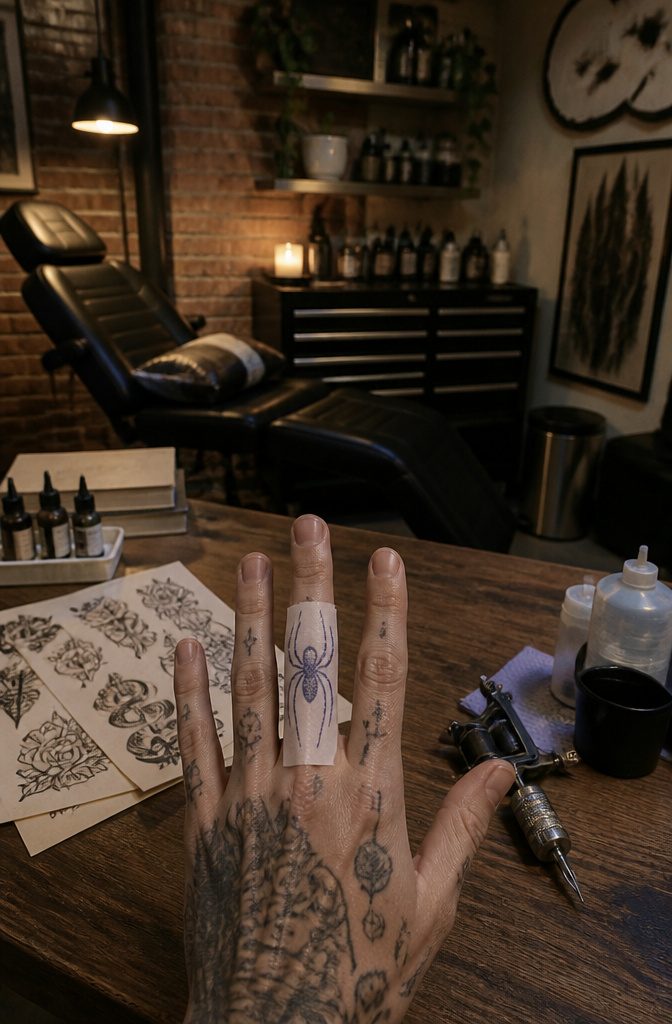
Spider tattoos work almost anywhere because the body stays compact while the legs reach. That geometry matters when you size the stencil.
Finger clearance shapes every hand stencil. A spider sitting on the back of the hand needs its legs to cross knuckles and dip between them without landing on the fingers themselves; the knuckle area tightens that further.
Rounded surfaces like the elbow or side of the neck let the legs spread and follow the form, so the stencil can stretch wider.
For the chest, stomach, back, or thigh, the stencil opens up. These larger canvases fit more detail and heavier shading, but the real limit is aging.
Legs placed too close together will blur into a dark mass in a few years as lines soften. The stencil needs enough spread between all eight legs to keep them readable long-term.
Tight spaces behind the ear still work because the spider body itself fills the spot; the legs just shorten or angle upward rather than radiate full length.
Leave the space between legs generous on any large piece. The detail you build into a chest or thigh spread will outlast the crowded version on a smaller placement every time.
Making the Stencil from Reference
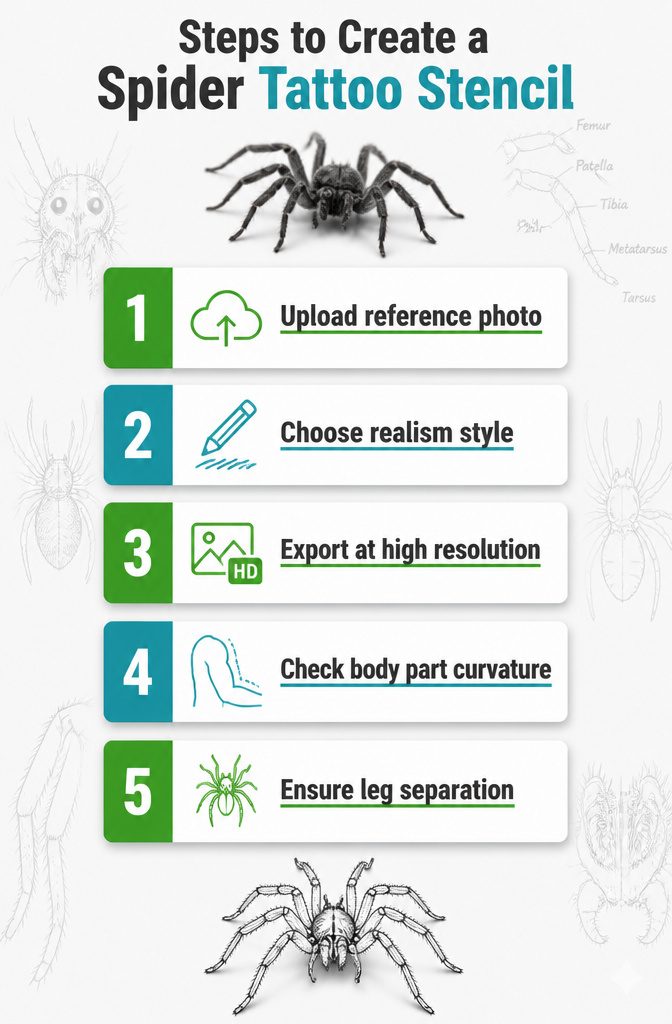
- Upload a reference photo with strong side lighting so the spider shows a clear highlight and shadow side. That contrast is what lets the software read the fur texture and keep each leg as its own crisp line instead of merging them into a blur.
- Choose the realism style that matches your end goal. Hatching gives texture and depth for a shaded piece; outline mode works better if you want a bold silhouette that reads clean from across a room.
- Export at high resolution for your thermal printer. Low-res files fuzz out the thin leg lines when they transfer, and those are the first details a client will notice are gone.
- Remember that arms, shoulders, and calves are rounded, not flat. What looks balanced on screen stretches when it wraps. Preview the stencil curved or ask the artist to check proportion against the body part before you commit to placement.
- If the reference is dim or backlit, the legs will run together in the stencil. Clear, well-lit separation between each leg in your source photo is the difference between a spider and a Rorschach blob on skin.
Frequently Asked Questions
What is the best style for a spider tattoo stencil?
Hatching works best for realism because it keeps fine leg hairs and glossy body texture, while outline mode gives a cleaner, bolder eight-legged silhouette that reads well from across a room.
The choice depends on whether you want depth and texture or immediate graphic impact. Your reference photo with strong side lighting matters either way.
Will the thin legs survive in the stencil?
Yes, if the legs are clearly separated and lit in your reference photo.
The stencil keeps each leg as its own crisp line rather than merging them into a blur. Overlapping shadows across two legs will fuse them in the stencil, so source images need that clean separation from the start.
What does a spider tattoo signify?
The three most common meanings are patience, creativity, and fate, though protection and warning surface too.
Fate pieces usually get heavy continuous outlines and finished webs; creativity calls for open structure and motion. Indigenous traditions across the Americas and West African and Caribbean lore add layers like weaving wisdom and survival that some clients want foregrounded.
How long will a tattoo stencil stay on?
Bold shapes and minimal line work resist smudging during transfer and softening after healing.